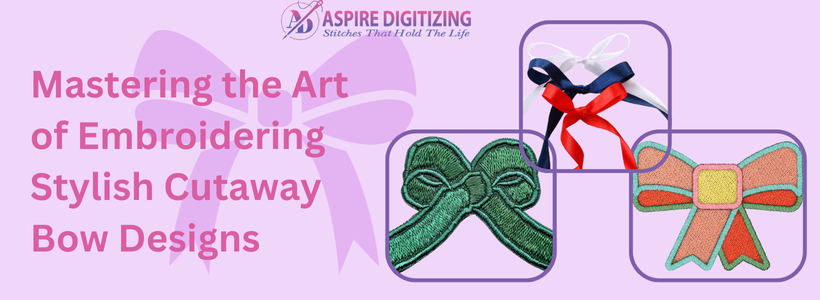
Cutaway Bow Embroidery Designs are a fantastic way to bring elegance and flair to your embroidery projects. These bows are not only visually appealing but also durable and long-lasting. In this comprehensive guide, we’ll walk you through the process of creating these beautiful bow designs, step by step. From selecting the best materials to adding those final touches, you’ll learn practical tips and techniques to achieve the perfect embroidered bows every time.
Whether you’re making hair accessories, home decor, or personalized gifts, these stylish bows will help elevate your work. Let’s dive in and create some stunning embroidered bows together!
What is a Cutaway Bow?
A cutaway bow is a distinctive design that showcases a unique “cutaway” appearance. In the world of fashion, particularly for men’s shirts, a cutaway collar refers to a style with wider points compared to traditional collars. This design creates a bold, elegant look and is perfect for showcasing larger tie knots like the Half or Full Windsor.
The cutaway Bow Embroidery Designs enhances the aesthetic of formal attire, allowing the tie knot to sit comfortably and stylishly without overshadowing the overall outfit.
Different Styles of Cutaway Bows for Embroidery
Cutaway Bow Embroidery Designs offer endless creative possibilities for decorating clothing, accessories, and even home decor. These designs can be customized with various fabrics, threads, and stitching techniques to suit any embroidery project. Here are some of the most popular styles:
1. Elegant Classic Bow
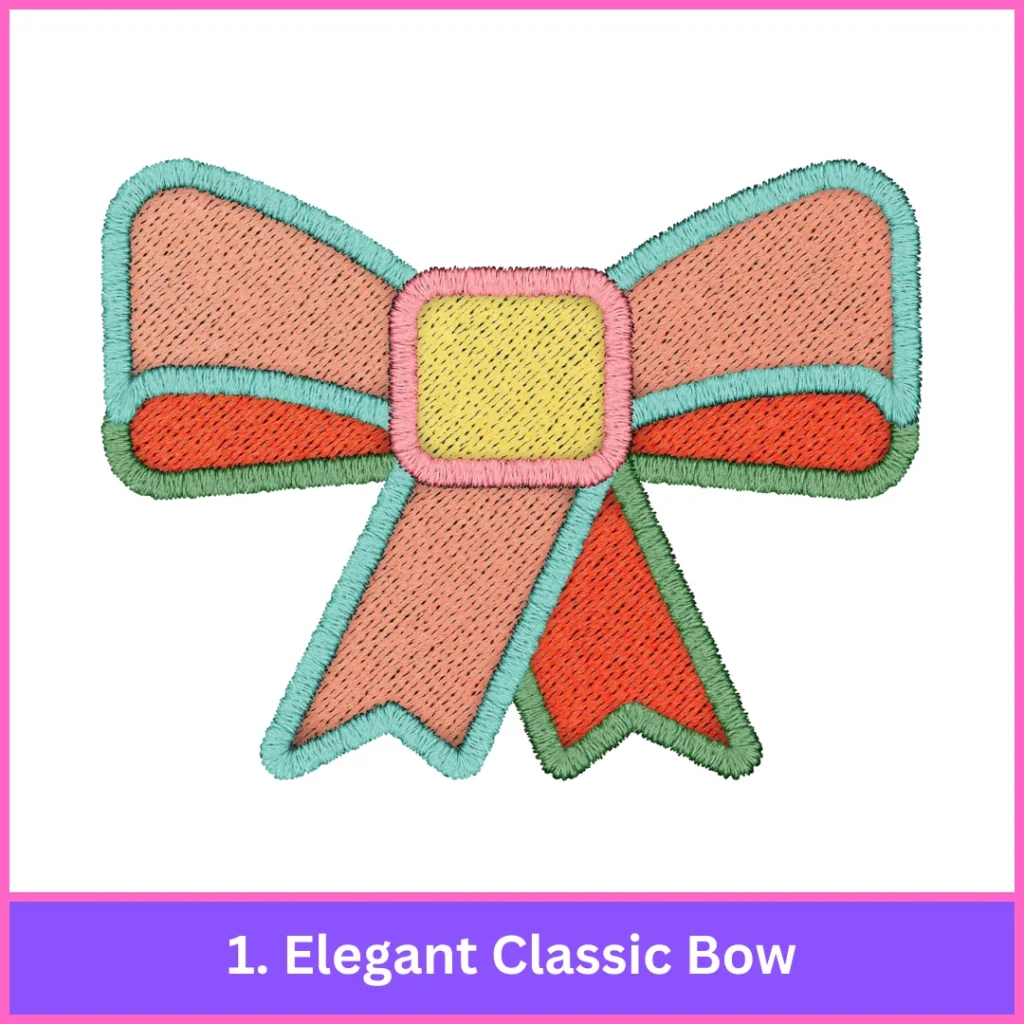
The Elegant Classic Bow is a timeless and sophisticated design, perfect for adding a polished touch to any project. Its smooth satin stitching gives it a refined appearance, making it an excellent choice for blouses, formal dresses, or decorative accessories.
2. Side Bow Appliqué
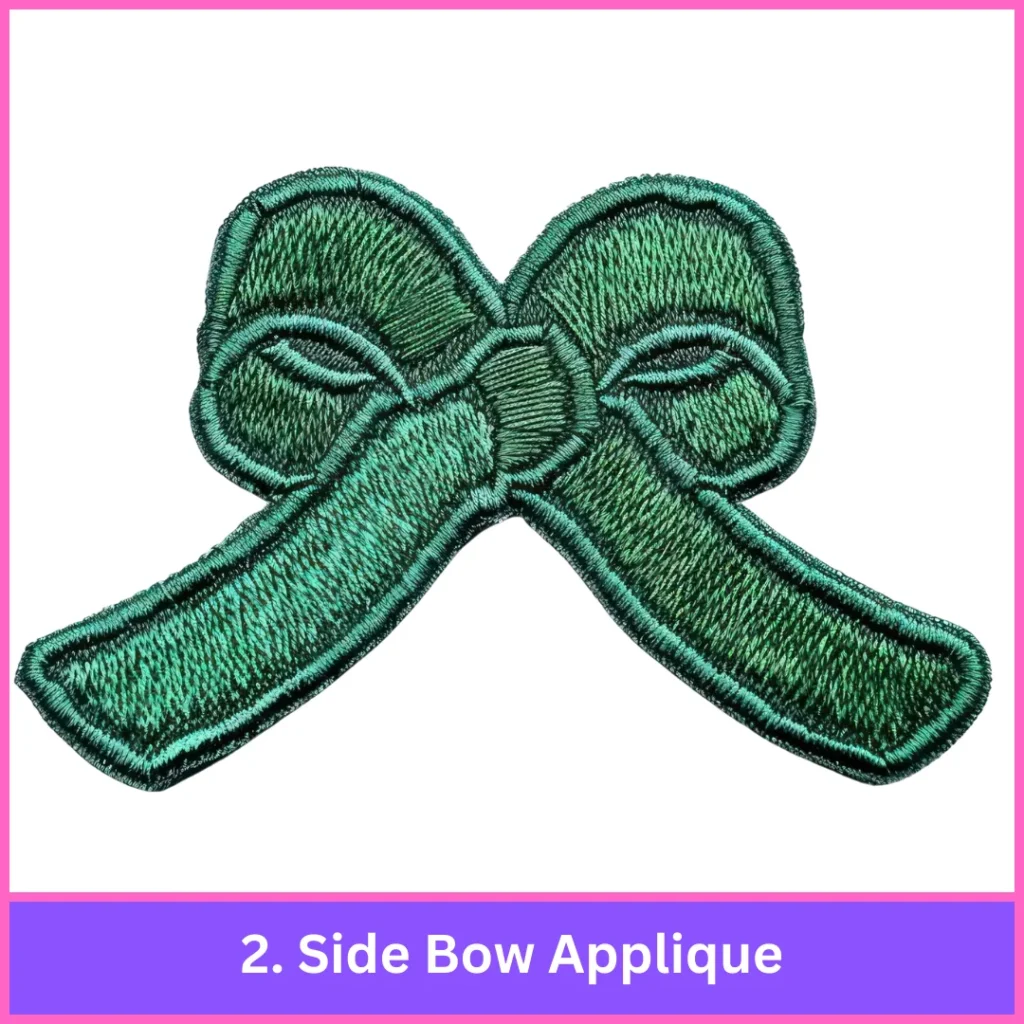
The Side Bow Appliqué is a trendy and modern bow design placed along the side of clothing, such as t-shirts or sweatshirts. These applique designs can be created with satin stitches or textured bean stitches, providing a unique and stylish look on casual outfits.
3. Straight Tailed Classic Bow
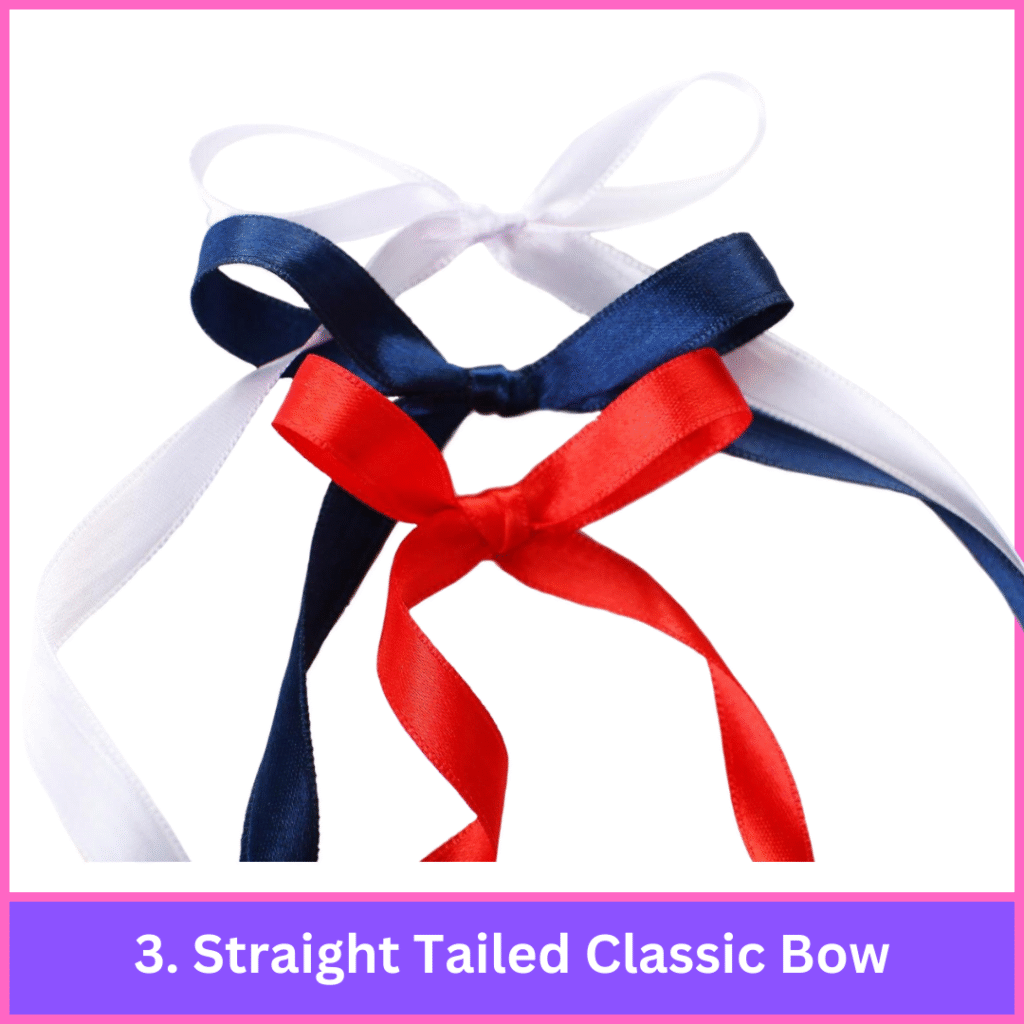
This Bow Embroidery Design features a neat, structured appearance with straight tails, giving it a professional and clean look. The Straight Tailed Classic Bow is perfect for jackets, skirts, and home decor items, making it suitable for both formal and casual embroidery projects.
4. Bean Stitch Bow
The Bean Stitch Bow adds texture and depth to your embroidery projects using a series of repeated stitches. This design is great for creating a detailed, raised effect on simple garments, offering a one-of-a-kind finish that stands out.
5. Cutaway Coquette Bow
The Cutaway Coquette Bow is a playful and charming design, full of delicate details. Its flirty shape makes it ideal for children’s clothing, festive outfits, or accessories like headbands.
Materials Needed for Embroidering Cutaway Bow Designs
To create beautiful and stylish cutaway Bow Embroidery Designs, you’ll need the following essential materials:
Fabric (Satin or Cotton)
Satin offers a glossy, smooth finish, perfect for formal designs, while cotton is breathable and versatile, making it great for casual or structured garments.
Embroidery Threads (e.g., Isacord, Floriani)
Isacord threads are strong and colorfast, ideal for long-lasting projects, while Floriani threads give a lovely sheen for vibrant, detailed embroidery.
Cut-Away Stabilizer
This stabilizer provides support to your fabric during stitching and ensures the design maintains its shape, especially for intricate or stretchy projects.
Heat N Bond Lite
A lightweight fusible adhesive that bonds fabric pieces together without adding bulk. It’s perfect for securing appliqué edges in your cutaway bow designs.
Rotary Cutter
This tool allows for precise and clean fabric cutting, which is essential for preparing fabric pieces for embroidery.
Cutting Mat
A self-healing mat that protects your workspace and provides grid lines for accurate and straight cutting.
Appliqué Scissors
These scissors allow you to trim around designs with precision, without damaging the fabric underneath.
Temporary Spray Adhesive
This repositionable spray helps hold fabric layers together temporarily, ensuring that everything stays in place while you stitch.
Embroidery Machine
An embroidery machine automates the stitching process, ensuring that your designs are embroidered accurately and efficiently.
Hoop (e.g., 8×13 Mighty Hoop)
The hoop keeps the fabric taut during embroidery, allowing you to stitch smoothly without damaging the fabric.
How to Machine Embroider Cutaway Bow Designs
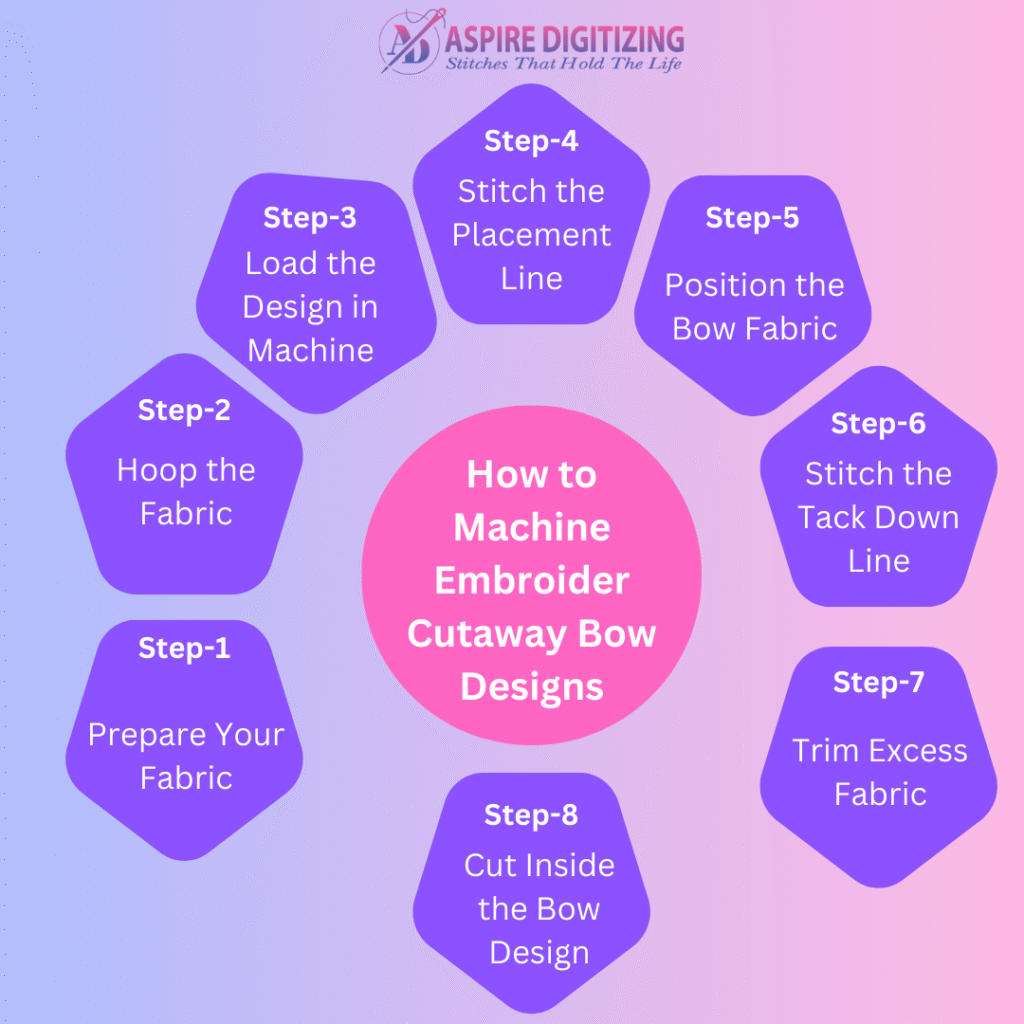
Wondering how to embroider bows? Here’s a step-by-step guide to creating the perfect cutaway bow design using your embroidery machine:
Step 1: Prepare Your Fabric
Choose a fabric like satin or cotton and iron it to remove any wrinkles. This ensures a smooth, flat surface for stitching
Step 2: Hoop the Fabric
Place the fabric, along with a layer of cut-away stabilizer, in the embroidery hoop. Ensure the fabric is taut but not stretched to avoid any puckering during stitching.
Step 3: Load the Design into the Machine
Upload your cutaway Bow Embroidery Designs to your embroidery machine. Don’t have a digitized design? No worries! At Aspire Digitizing, we can digitize the design for you at an affordable price. Our team guarantees high-quality designs with a fast turnaround time, so you can start stitching right away. A well-digitized design ensures that your project has a clean, professional finish.
Once the design is ready, use the alignment features on your embroidery machine to center it within the hoop for accurate stitching.
Step 4: Stitch the Placement Line
Place the fabric, along with a layer of cut-away stabilizer, in the embroidery hoop. Ensure the fabric is taut but not stretched to avoid any puckering during stitching.
Step 5: Position the Bow Fabric
Carefully place your bow fabric over the stitched placement line. Use temporary spray adhesive or pins to hold it in place.
Step 6: Stitch the Tack Down Line
Run the machine again to stitch the tack down line, which will secure the bow fabric to the base fabric.
Step 7: Trim Excess Fabric
Once the hoop is removed from the machine, carefully trim away the extra bow fabric around the tack-down line. Be precise, but avoid cutting the stitching.
Step 8: Cut Inside the Bow Design
If the Bow Embroidery Designs includes cutout sections, carefully trim the fabric inside the bow to achieve the cutaway effect. Be cautious not to damage the stitching.
Step 9: Finish with Satin Stitch
Reattach the hoop to the machine and run the final satin stitch around the edges of the bow to create a smooth and polished finish.
Step 10: Remove Stabilizer
Once the embroidery is complete, gently trim or tear away any excess cut-away stabilizer from the back of the fabric.
Step 11: Final Touches
Lightly press the finished design to remove wrinkles and trim any loose threads for a neat, professional look.
Applications of Cutaway Bow Designs
Cutaway bow Bow Embroidery Designs can be used in various creative ways to enhance fashion and home décor. Here are some popular applications:
Fashion Apparel: Cutaway bows add a trendy touch to t-shirts, sweatshirts, and dresses, turning simple clothing into stylish statement pieces.
Children’s Clothing: These bows add a playful, whimsical touch to kids’ outfits, making them more fun and appealing.
Accessories: Cutaway bows can be embroidered on headbands, bags, and hair clips to create unique, personalized accessories.
Seasonal Decor: Perfect for holiday-themed garments, festive outfits, or special decorations, these bows bring a cheerful vibe to any celebration.
Home Textiles: Use cutaway bow designs on pillow covers, table runners, or wall hangings to add creativity and elegance to your home décor.
Promotional Items: Businesses can use cutaway bow embroidery to add a branded, standout touch to uniforms, promotional clothing, or accessories.
Gifts and Personalized Items: Embroidered cutaway bows are perfect for creating personalized gifts, such as monogrammed items, custom clothing, or accessories, making them memorable and special.
Bottom Line
In conclusion, creating cutaway Bow Embroidery Designs is a simple and enjoyable process that can add a touch of elegance to your embroidery projects. By following these easy steps, you can craft beautiful and stylish embroidered bows that will stand out in any project.
For those seeking flawless Bow Embroidery Designs without any hassle, Aspire Digitizing is here to assist you! We offer high-quality digitizing services at affordable prices, with a super-fast turnaround. Plus, you can preview your design before finalizing it.
As a first-time customer, enjoy a 50% discount on your initial order. Don’t wait—let Aspire Digitizing bring your embroidery ideas to life. Order now and make your projects truly unique!
FAQs
What materials are best for creating cutaway bow embroidery designs?
Use durable fabrics such as cotton, felt, or canvas that hold embroidery well. Choose high-quality threads and sharp needles for precise stitching.
What type of stabilizer should I use for cutaway Bow Embroidery Designs?
A cutaway stabilizer is the ideal choice as it provides strong support during stitching and remains in place after trimming, ensuring your bow designs stay neat.
Can beginners create stylish cutaway Bow Embroidery Designs?
Absolutely! Beginners can easily create beautiful cutaway bows by following simple steps and starting with basic patterns. With a bit of practice, anyone can achieve professional results.