High-quality embroidery designs don’t happen by chance; they’re created with smart choices and careful attention. Every detail, from the fabric you pick to the way you stitch, plays a role in the final result. With the right tips and techniques, you can turn ordinary embroidery designs into something truly remarkable.
Here are 17 professional tips to help you elevate your embroidery skills and create embroidery designs that impress:
Follow Design Guidelines
Utilize Embroidery Templates
Mind the Design Dimensions
Keep Designs Simple
Optimize Color Selection
Use Solid Colors, Not Gradients
Avoid Small Text and Thin Lines
Limit the Number of Colors
Incorporate Bold Lines and Clean Shapes
Avoid Tiny Details
Manage and Plan Color Changes
Choose the Correct Size Design
Select Appropriate Stabilizers
Use the Right Needle Type and Size
Print Out Your Design Template
Stitch at a Slower Speed for Quality
Partner with a Professional Digitizing Service
1. Follow Design Guidelines
Understanding your embroidery machine’s specifications is one of the most important machine embroidery tips for creating high-quality embroidery designs. Every machine has its limitations, such as stitch types, maximum stitch count, and fabric compatibility.
Ignoring these guidelines can lead to issues like overly dense embroidery designs that cause puckering or thread breakage. Carefully read your machine’s manual and software documentation to understand its capabilities.
For example, if your machine doesn’t support certain decorative stitches, choose alternatives that achieve a similar effect while being machine-friendly. Adhering to these guidelines ensures your embroidery designs are optimized for smooth stitching.
2. Utilize Embroidery Templates

Templates are essential for creating high-quality embroidery designs and streamlining your embroidery process. Many embroidery design software programs offer pre-made templates tailored for specific items like caps, shirts, or bags.
These templates allow you to visualize your design’s placement, ensuring it fits within the intended area. Pay attention to the placement guides provided by the template, as these help you align the design correctly on the fabric.
For example, if you’re embroidering a left-chest logo on a polo shirt, a template ensures precise positioning, reducing errors and saving time.
3. Mind the Design Dimensions
The size of your embroidery design is a critical factor in achieving a professional appearance. Start by measuring the area where you’ll be stitching, such as the back of a jacket or the center of a pillow.
Embroidery designs that are too large may overwhelm the space, while those that are undersized may appear awkward or lack impact. Keep in mind that smaller designs often lose intricate details, so simplicity is key.
Ensure that fine elements are at least ¼ inch in size to stitch cleanly without appearing blurry or unrecognizable.
4. Keep Designs Simple
Simplicity often leads to better results in embroidery designs. Complex embroidery patterns with numerous tiny details can become muddled when translated into stitches. Focus on bold shapes, clean lines, and patterns that are easy to recognize even from a distance.
For instance, instead of intricate floral embroidery designs, opt for a bold flower silhouette. Simpler embroidery designs not only enhance visual appeal but also make the embroidery process faster and more efficient, reducing potential errors like thread breaks or skipped stitches.
5. Optimize Color Selection

The right color palette can make or break your embroidery designs. Use a color wheel to select complementary or contrasting colors that stand out and enhance each other.
Consider the fabric color when choosing threads; a high-contrast combination, such as white thread on navy fabric, ensures the embroidery design is highly visible.
Always test your thread colors on fabric swatches before starting the embroidery to see how they look under various lighting conditions and against the fabric.
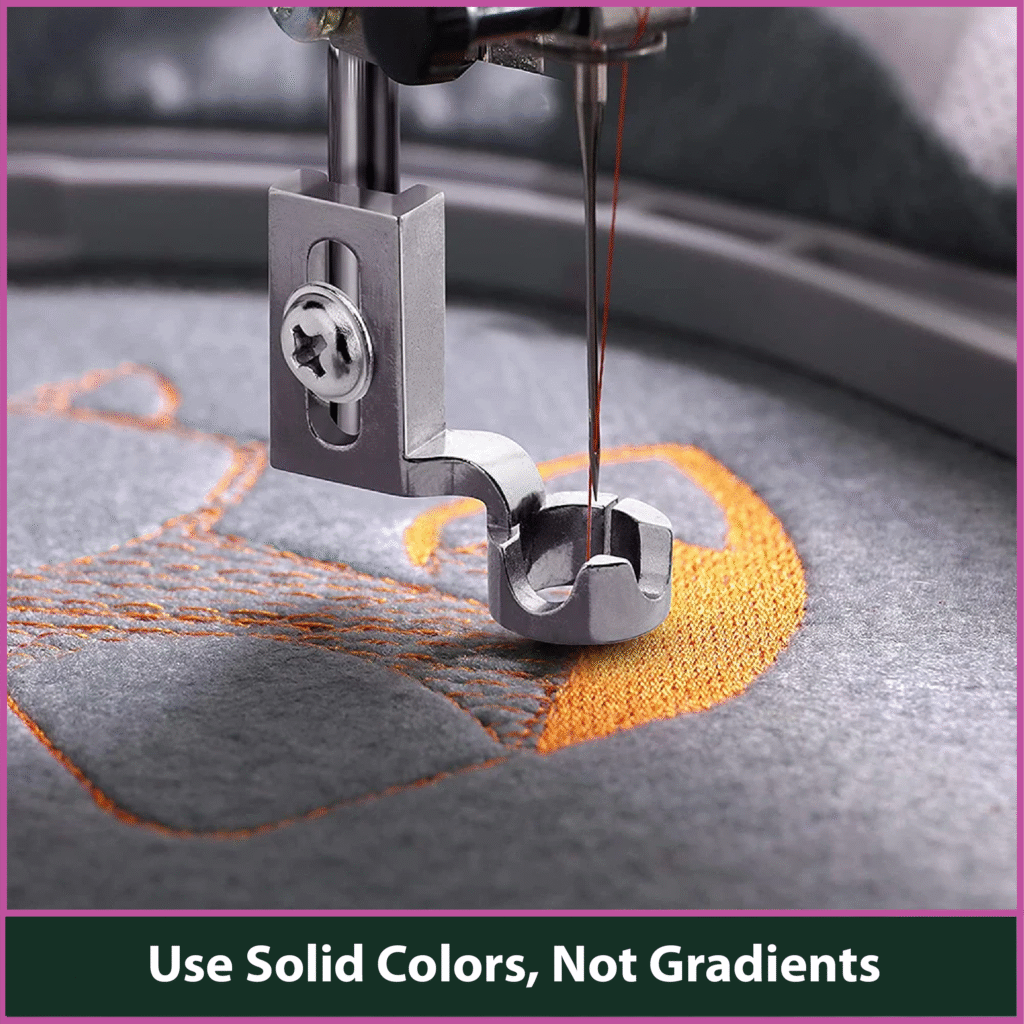
6. Use Solid Colors, Not Gradients
Embroidery relies on solid thread colors, which is essential for creating high-quality embroidery designs. Gradients or subtle transitions are often difficult to achieve, but you can use embroidery design techniques like varying stitch density to create the illusion of shading.
For instance, denser stitches can be applied in darker areas, while lighter stitches work well for highlights. This method helps maintain the vibrancy and clarity of your embroidery designs, ensuring they look professional while staying within the limitations of embroidery.
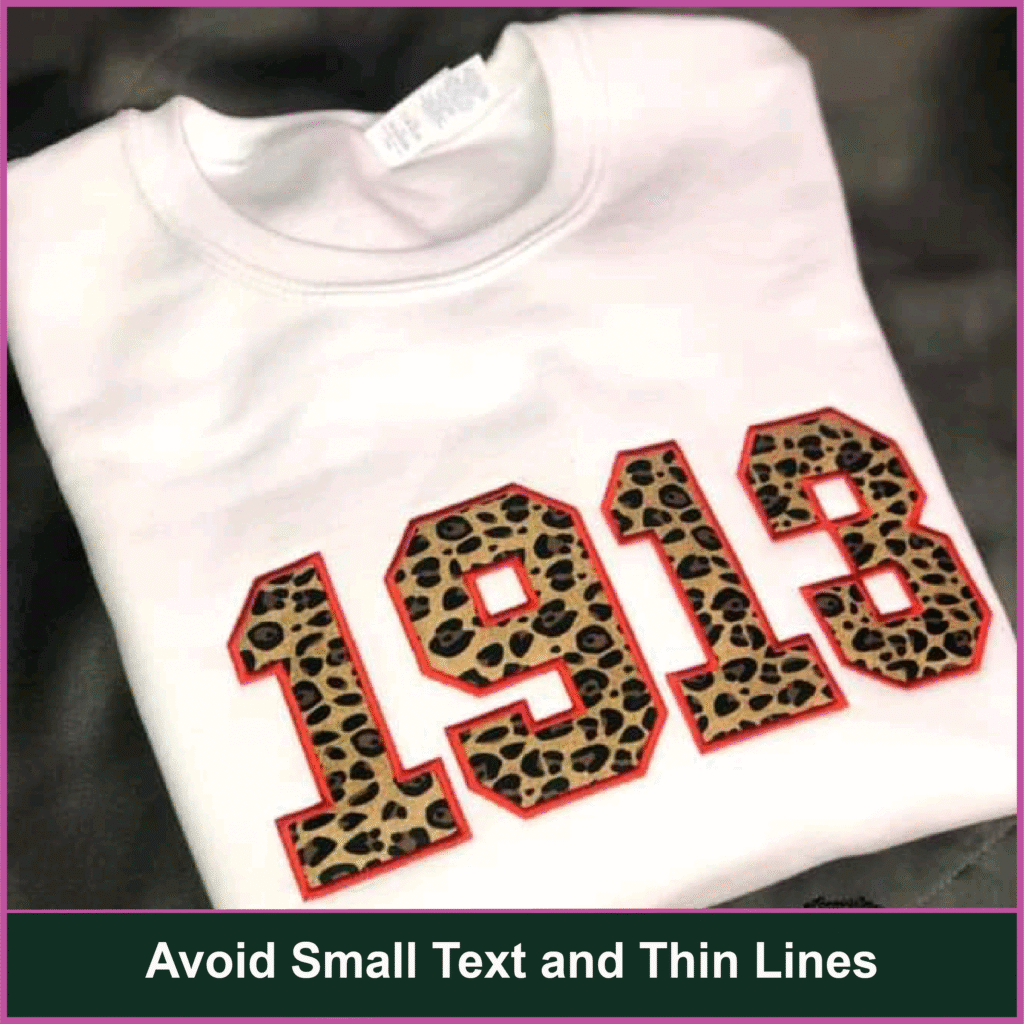
7. Avoid Small Text and Thin Lines
Small text and thin lines can become illegible or incomplete when embroidered. Threads have a thickness that limits the level of detail that can be achieved.
Use larger font sizes—at least 0.25 inches tall—and thicker lines to ensure clarity and durability.
Additionally, test your embroidery designs on a scrap piece of fabric to see how the text and lines appear when stitched, allowing you to make adjustments before starting your main project.
For example, a bold sans-serif font works better for embroidery designs than a delicate script font. This ensures your embroidery designs remain easy to read and visually appealing.
8. Limit the Number of Colors
Using too many colors in a single embroidery design can complicate the process. Each color change requires stopping the machine, switching threads, and realigning the design, which increases production time and the risk of errors.
Limit your palette to three to five harmonious colors that complement the fabric. This creates a cohesive and professional look while simplifying the stitching process.
9. Incorporate Bold Lines and Clean Shapes
Bold lines and clean shapes make embroidery designs more prominent and easier to embroider accurately. Avoid overlapping elements or intricate patterns that may confuse the machine.
Use vector graphics software to create scalable embroidery designs with precise, clean lines that translate well into stitches. For example, if you’re designing a logo, emphasize bold outlines and simple shapes that stand out against the fabric background.
10. Avoid Tiny Details
Embroidery is not well-suited for tiny details due to thread and machine limitations. Focus on larger, more prominent elements that can be easily recognized from a distance.
If fine details are essential, consider using additional techniques like appliqué or layering fabrics to enhance the embroidery design without relying solely on intricate stitching. This approach ensures clarity and visual impact.
11. Manage and Plan Color Changes
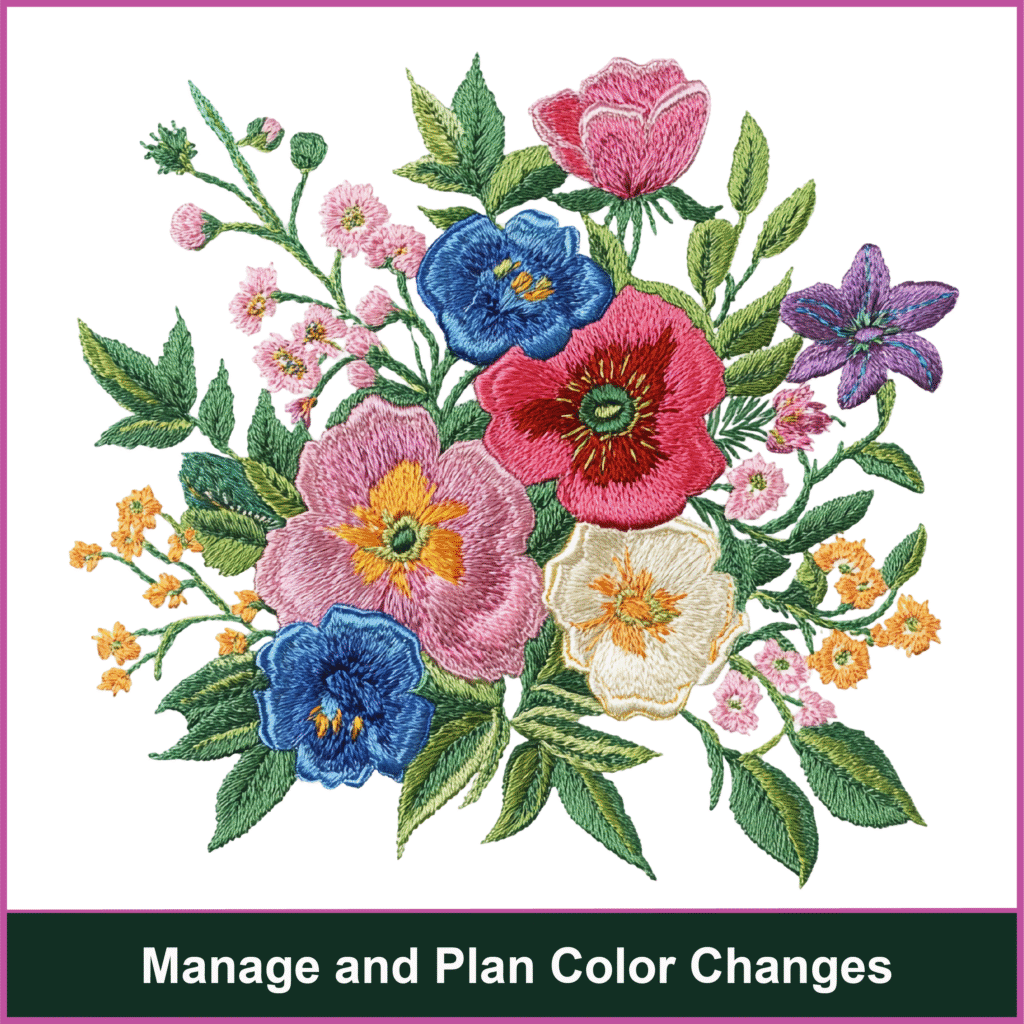
Frequent color changes can disrupt the embroidery process and make it harder to achieve high-quality embroidery designs. To avoid this, plan your design so that similar colors are grouped.
For example, stitch all sections using one color before switching to the next. This approach minimizes thread changes, reduces downtime, and ensures a smoother, more efficient workflow.
It also helps maintain consistency in your embroidery designs and reduces the chances of alignment errors, giving your final product a professional finish.
12. Choose the Correct Size Design
The embroidery design should fit comfortably within the embroidery hoop or frame without requiring resizing or splitting. Oversized designs can lead to alignment issues, while undersized designs may look out of place on larger items.
Measure the available space accurately and adjust the embroidery design size to achieve a balanced and polished result.
13. Select Appropriate Stabilizers
Stabilizers are essential for maintaining fabric stability during embroidery. They prevent puckering, distortion, and thread tension issues.
Choose the stabilizer based on your fabric type: tear-away stabilizers for sturdy fabrics, cut-away stabilizers for stretchable materials, and wash-away stabilizers for delicate fabrics. Proper stabilization ensures a smooth and high-quality finish in all your embroidery designs.
14. Use the Right Needle Type and Size
Using the correct needle type and size is critical for achieving clean and precise embroidery. For example, use ballpoint needles for knits to prevent snags and sharp needles for woven fabrics.
Match the needle size to the fabric weight and thread thickness to avoid issues like holes in the fabric or thread breakage.
15. Print Out Your Design Template
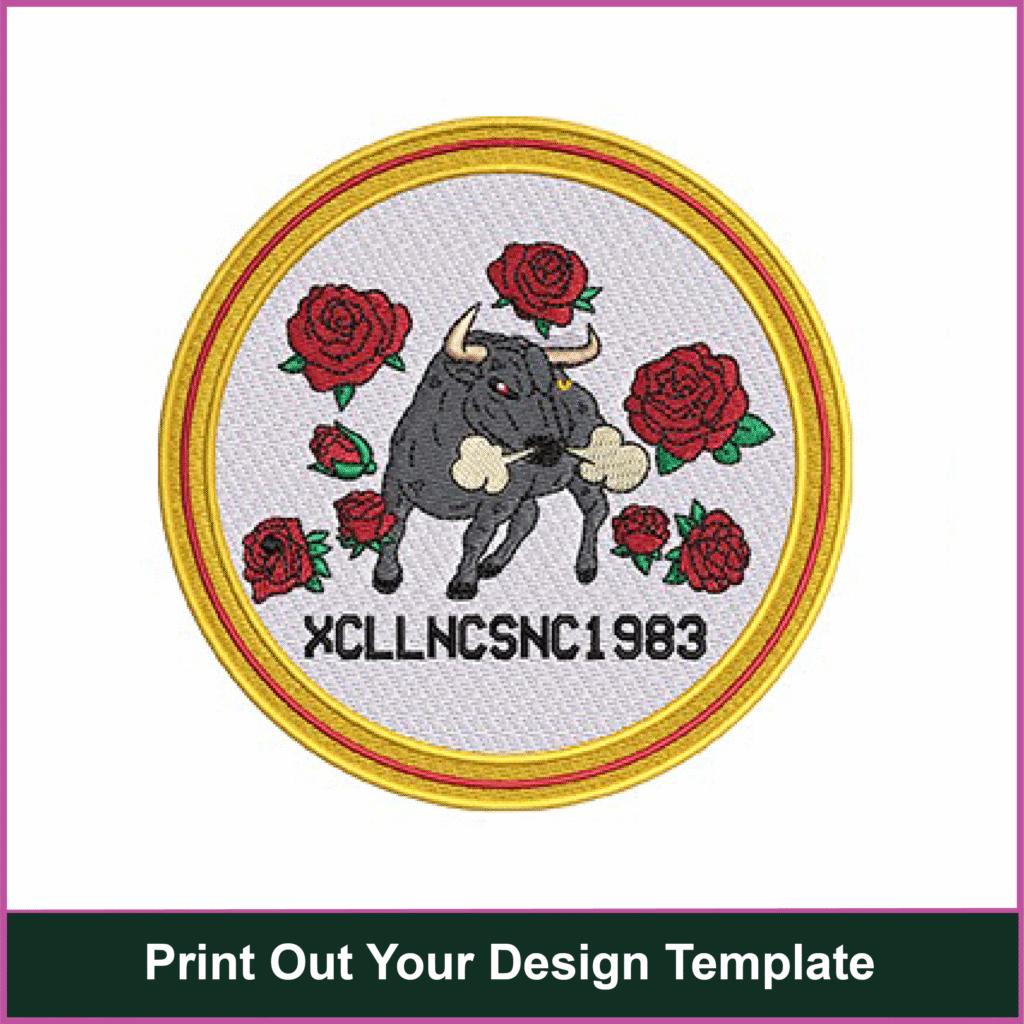
Before starting the embroidery process, print your embroidery design at actual size or use embroidery design software simulations to preview it. This step is essential for creating high-quality embroidery designs as it allows you to evaluate placement, proportions, and overall aesthetics.
By identifying and correcting any issues early, you can avoid costly mistakes during stitching. Proper planning at this stage ensures your final embroidery designs are precise, visually appealing, and professionally executed.
16. Stitch at a Slower Speed for Quality
Slowing down the stitching speed allows for greater precision, especially when working on intricate custom embroidery designs or delicate fabrics.
High-speed stitching increases the risk of skipped stitches, puckering, or misalignment. Lower speeds ensure smooth fabric movement and consistent stitch quality, resulting in a polished final product.
17. Partner with a Professional Digitizing Service
For intricate or complex embroidery designs, a professional digitizing service can ensure the best results. Digitizing services, like Aspire Digitizing, convert your designs into machine-ready formats with optimal stitch settings.
Professionals understand the nuances of stitch types, density, and underlays, ensuring your embroidery designs look flawless. Partnering with a service saves time and effort, especially for detailed or large-scale projects.

Final Verdict
Creating high-quality embroidery designs becomes much easier when you follow the right steps. From choosing the perfect fabric to ensuring proper alignment, each tip helps you achieve stunning, professional results.
At Aspire Digitizing, we understand the importance of precision and quality in embroidery designs. That’s why we offer professional digitizing services at the most affordable rates, ensuring super-fast turnaround times and guaranteed quality. Plus, if you’re trying us for the first time, you’ll get an exclusive 50% off your first order.
Get Started Today!
FAQs
Why is digitizing important in embroidery design?
Digitizing converts your design into a machine-readable format, ensuring accurate stitching and maintaining clarity, especially in intricate patterns.
How do I select the right fabric for embroidery designs?
Choose stable fabrics like cotton or linen for beginners. Stretchy or delicate fabrics need extra stabilizers for the best results.
Can I create detailed designs on all fabrics?
Thick fabrics like canvas are great for detailed designs. Thin or stretchy fabrics may distort fine details.
What software is best for designing embroidery patterns?
Popular choices include Wilcom, Hatch, and Brother PE-Design, offering tools for creating and optimizing designs.